AWS Route 53 TTL (Time To Live) is the amount of time that a response to a Route 53 request will be good for. So the local client machine may cache that response and be assured that the corresponding data is good for the equivalent time period. Specifying the TTL is a balance between reducing the number of requests that the Route 53 service receives and ensuring that the cache data on the remote machines is updated with any changes. Having a high TTL of 24 hours reduces the flexibility of changes you can make to your systems, while having a low TTL of 30 seconds will increase the number of Route 53 hits subsequently increasing your costs. All Route 53 records require you to define a TTL, except Alias records.
AWS Route 53 Creating your first record
AWS Route 53 Registering a domain is requirement when you bring organizational domain(s) into the AWS Cloud. It allows your organization’s URLs to be resolved on the internet to your VPC within AWS. This article describe
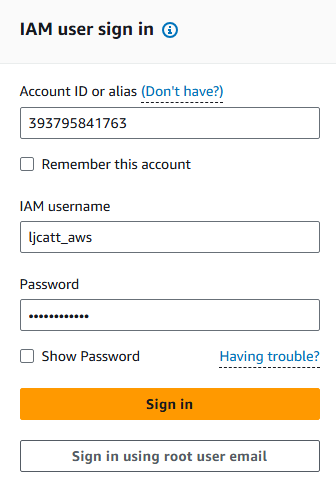
1. Logon to AWS as an IAM user at URL: https://signin.aws.amazon.com/
2. From the Home Console type Route 53 in the search bar, select the star next to Route53, and select Route 53.

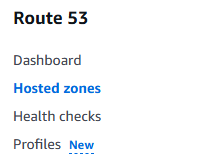
3. On the left hand menu bar scroll down to Hosted zones and select Hosted zones.
4. Under Hosted zones page, select the Hosted zone name.

5. Click the create record button.

6. Enter a record name, Record Type , Value, TTL in seconds, select simple routing, and click the create records button.
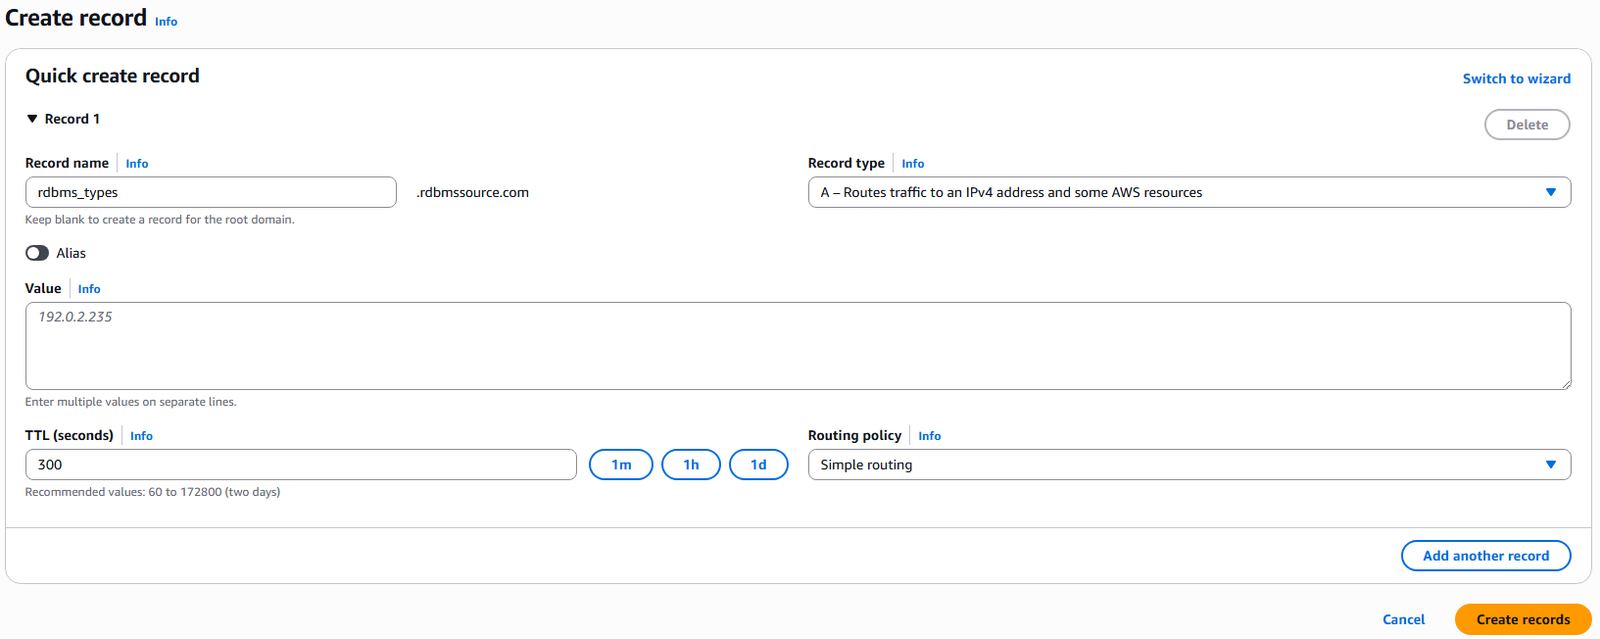
7. The record is created, but since we currently do not have an IP 192.0.2.235, it will not produce a result from a web browser. However, we can test the function through other methods below.

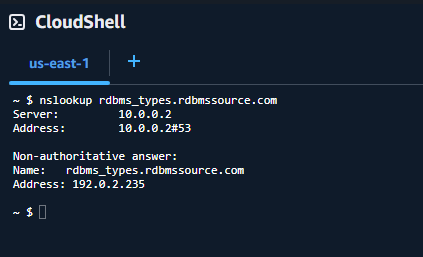
8. Open the CloudShell console by clicking the cCloudShell icon on the top banner.
9. Once CloudShell is open install the utilities so we can us nslookup command with the command “sudo yum install -y bind-utils”

10. Now if we do an nslookup of the route 53 record we just created you will see the value is in fact returned. Command: “nslookup rdbms_types.rdbmssource.com”
11. Using the dig command “dig rdbms_types.rdbmssource.com:

12. This completes making a simple Route 53 record.
AWS EBS Volume Type
There are 6 types of EBS volume types
gp2/gp3 (SSD) – General Purpose SSD good blances of price and performance.
1. Can be used as boot volumes
2. Cost effective
3. 1GiB to 16TiB
4. gp3 3000 IOPS and 125MiB/s base
5. gp3 16000 IOPS and 1000MiB/s max
6. gp2 older with less performance
========================
io1/io2 Block Express (SSD) – Highest performance SSD volume for mission critical.
1. Can be used as boot volumes
2. Critical system
3. databases would be a good use of these volumes
4. io1 4GiB – 16TiB PIOPS to 64000
5. i02 4GiB – 64TiB PIOPS to 256000
6. Support EBS multi-attached feature
========================
St1 (HDD) – Low cost HDD for frequently accessed and high throughput.
1. Cannot be used as boot volumes
2. 125GiB to 16TiB
3. Data Warehousing, batch processing.
4. 500 IOPS and 500MiB/s base
========================
Sc1 (HDD) – Lowest cost HDD designed for less accessed data.
1. Cannot be used as boot volumes
2. 125GiB to 16TiB
3. Data Warehousing, batch processing.
4. 500 IOPS and 500MiB/s base
AWS Route 53 Registering a domain
AWS Route 53 Registering a domain is requirement when you bring organizational domain(s) into the AWS Cloud. It allows your organization’s URLs to be resolved on the internet to you VPC within AWS. This article describe the process of registering your domain with AWS.
1. Logon to AWS as an IAM user at URL: https://signin.aws.amazon.com/

2. From the Home Console type Route 53 in the search bar, select the star next to Route53, and select Route 53.

3. On the left hand menu bar scroll down to Domains and select Registered Domains.
4. Currently we will have no domains registered with AWS and you have two choices:
– You can transfer an existing registered domain into AWS.
– You can create and purchase a new domain with AWS.

5. First we have to determine if the domain name we desire is available, We are looking for a domain named rdbmssource.com and it is available, so we choose the Select button at a cost of $14.00 per year
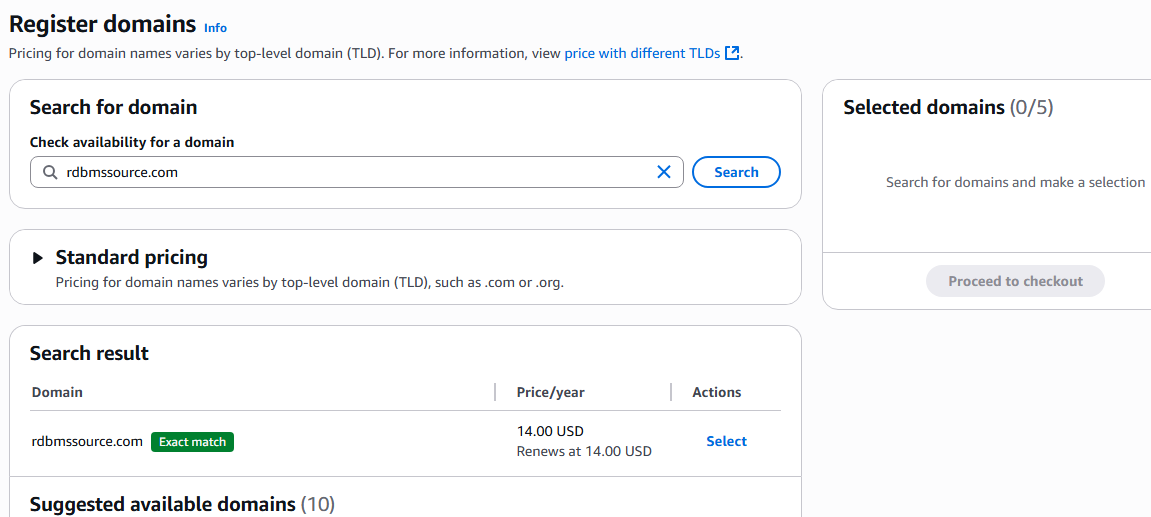
6. On the next pages select Proceed to checkout to purchase this domain.

7. Select the duration you will have the domain and ensure that Auto-renew is selected. Then press Next

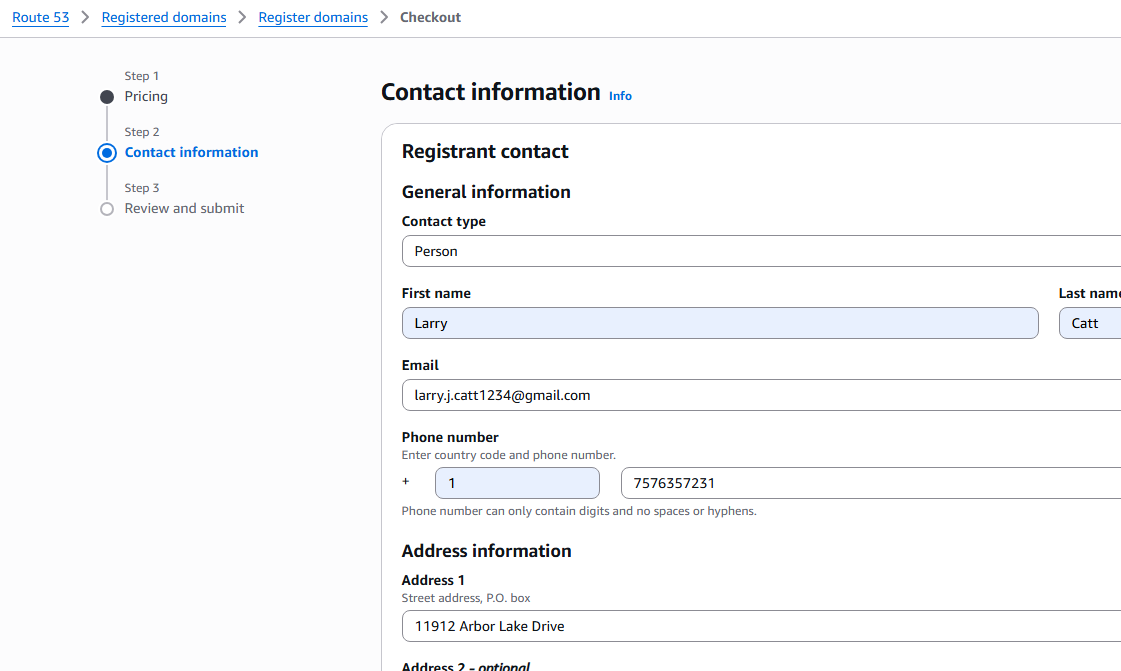
8. Fillout your contact information.
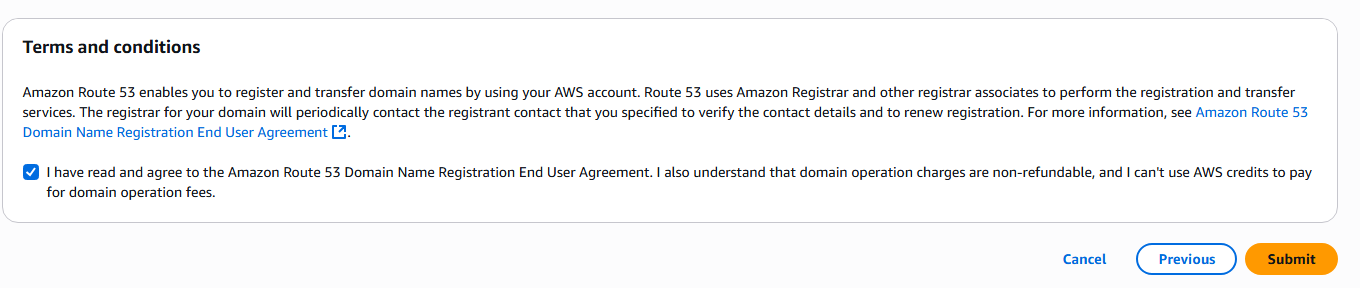
9. Review all the information and check mark the terms and conditions and click the submit button.
10. You will see the configuration is in progress, click the check status button to get an update.

11. Completes Registration of Domain on AWS.
AWS Route 53
AWS Route 53 is a DNS service that can be managed by the end user. It is a service created by the AWS customer and provides high availability, scalable, managed and authoritative DNS resolution. The service name “Route 53” comes from the original DNS service port which is port 53.
Route 53 service provides the following:
- DNS Resolution
- Domain Registrar
- Ability to perform health checks on AWS resources.
- Is the only AWS service providing 100% availability SLA
Route 53 Records consists of the following:
- Domain and subdomain name
- Record type example: A or AAAA
- Value – the IP number of the record.
- Routing Policy is how the Route 53 responds to queries.
- TTL is the amount of time the record cached at DNS Resolvers
Route 53 supports the following record types
- A = Maps a hostname to IPv4
- AAAA = Maps a hostname to IPv6
- CNAME = Maps a hostname to another hostname
- target must be a domain name which must be an A or AAAA record.
- Cannot be top node of a DNS namespace
- NS = Name Servers for the Hosted Zone
- Controls how traffic is routed for a domain
- Other record types include: (CAA, DS, MX, NAPTR, PTR, SOA, TXT, SPF, SRV)
Hosted Zones are
- Is a container for records that define how to route traffic to a domain and its subdomain.
- Two types of Zones:
- Public Hosted Zone – contains records to route traffic on internet.
- Private Hosted Zone – contains records to route traffic on one or more VPCs (private domain names)
- AWS charges $0.50 a month per hosted zone you create.
- Public Hosted Zones can be queried by any one outside of your domain
- Private Hosted Zones can only be queried by someone inside of your domain.
AWS Ports to Know
AWS and all computer systems divide networking traffic by IP address and subsequent ports. Ports are designed to subdivide network traffic to a specific protocol, application or process being used. It is helpful to know the most common ports used in modern information systems and below are the ones you should know for AWS certification.
| Protocol | Port |
| FTP | 21 |
| SSH | 22 |
| SFTP | 22 |
| HTTP | 80 |
| HTTPS | 443 |
| PostgreSQL | 5432 |
| MySQL | 3306 |
| Oracle | 1521 |
| MSSQL | 1433 |
| MariaDB | 3306 |
| Aurora PostgreSQL | 5432 |
| Aurora MySQL | 3306 |
AWS ElastiCache Security
AWS ElastiCache are in memory databases with very high performance and low latency. They designed to reduce the load on databases for high levels of reads. They allow your application to be stateless by placing the placing the current state of the data into ElastiCache. AWS takes care of OS maintenance, optimization, setup, configuration, monitoring, recovery and backup of the ElastiCache making it transparent to customer. Normally you have to perform a lot of code changes for existing application to use the ElastiCache option.
ElastiCache Security characteristics:
- For Redis IAM Authentication is support
- All other ElastiCache options require username and password
- IAM policies are only used for AWS API level security
- Redis AUTH
- You can set password/token where creating a Redis cluster
- Providing extra layer of security for you cache above you security group
- Support SSL for network encryption.
- Memcached
- Supports SASL based authentication
ElastiCache – Redis Use Case:
- Establishing the leader in a game.
- Each time a new score is added, it is ranked against all other scores (sorted) and presented in correct order.
- This guarantees that the leader is always displayed at the top and in descending order.
AWS ElastiCache Build
AWS ElastiCache are in memory databases with very high performance and low latency. They designed to reduce the load on databases for high levels of reads. They allow your application to be stateless by placing the placing the current state of the data into ElastiCache. AWS takes care of OS maintenance, optimization, setup, configuration, monitoring, recovery and backup of the ElastiCache making it transparent to customer. Normally you have to perform a lot of code changes for existing application to use the ElastiCache option. Here we will build an ElastiCache service for use in your AWS environment.
1. Logon to AWS as an IAM user at URL: https://signin.aws.amazon.com/

2. From the Home Console type elasticache in the search bar, select the star next to ElastiCache, and select ElastiCache
3. Click the Get started button and select Redis OSS

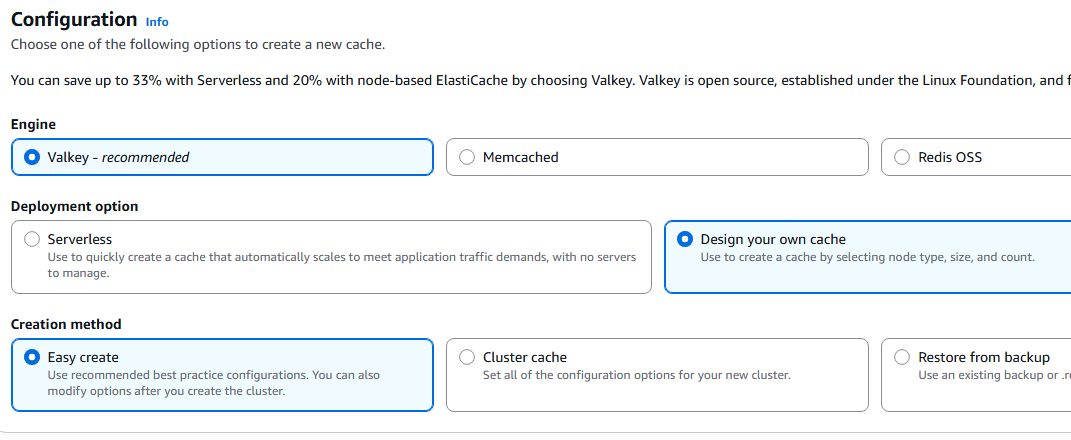
4. Next AWS will try to move you to the newer ElastiCache option of Valkey which will reduce cost with open source option. Select create Valkey.
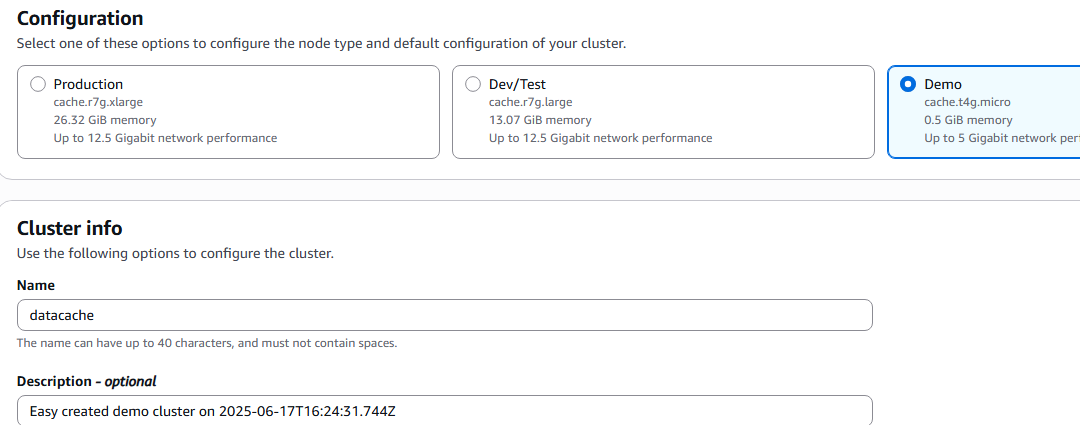
5. Under Configuration select Valkey, Design your own cache, Easy create.
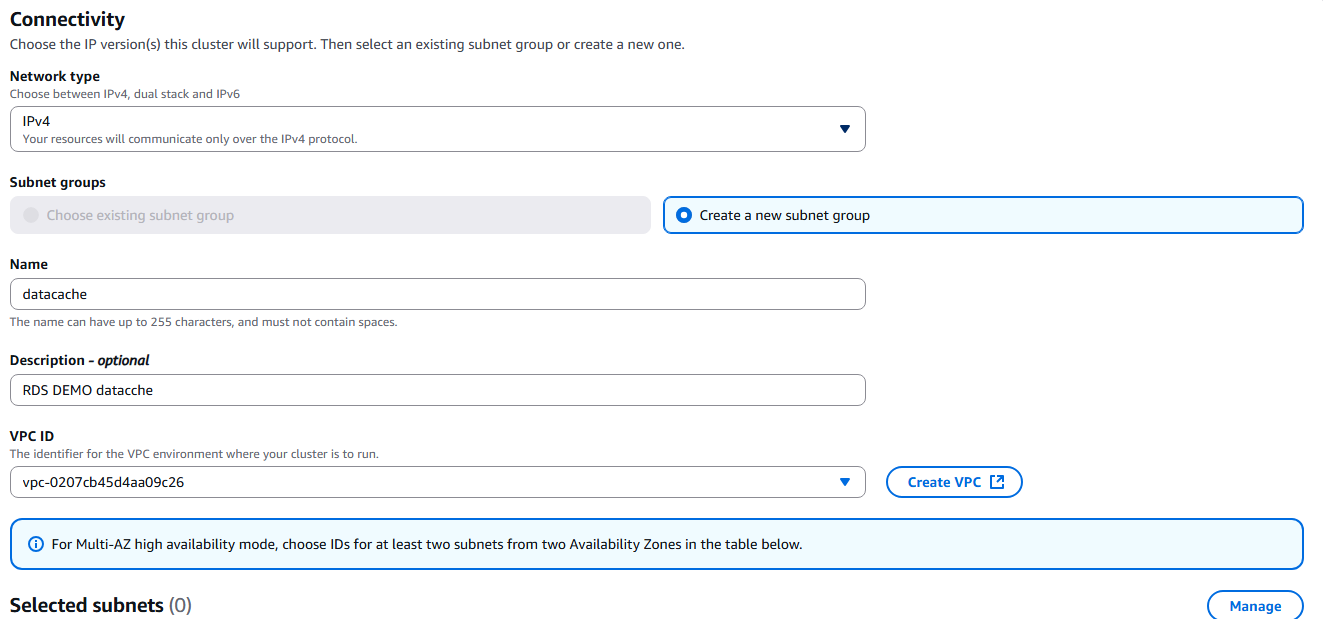
6. Under Configuration select Demo and under cluster information enter a name for your cache.
7. Under Connectivity select Create a new subnet group and name the group.
8. Then click the Create button at the bottom of options.

9. This completes creating a ElastiCache in your AWS environment.
AWS ElastiCache Overview
AWS ElastiCache are in memory databases with very high performance and low latency. They designed to reduce the load on databases for high levels of reads. They allow your application to be stateless by placing the placing the current state of the data into ElastiCache. AWS takes care of OS maintenance, optimization, setup, configuration, monitoring, recovery and backup of the ElastiCache making it transparent to customer. Normally you have to perform a lot of code changes for existing application to use the ElastiCache option.
The architecture to use ElastiCache for RDS interaction:
- Application query the ElastiCache
- If ElastiCache has required data it returns to Application
- If ElastiCache does not have required data it queries the RDS and returns it to Application (storing internally for next use).
- This helps reduce the frequency of access to RDS proper
- The application has to have a ElastiCache validation method to ensure data is most up to date.
The architecture to use ElastiCache for User Session Store:
- User logon to application
- Application writes user session data to ElastiCache
- User hits a different application instance and their user session data is still valid.
- Thus reducing the number of logins required by end user.
Compare Redis vs Memcached:
Redis:
- Multi AZ with auto-failover
- Provides read replicas to scale reads and give you high availability
- Provides backup and restore
- Support sets and sorted sets
Memcached:
- Multi-node for partitioning of data providing sharding
- Does not provide read replica
- It is not persistent
- provides backup and restore only with serverless version
- provides multi-threaded architecture which increases performance.
AWS RDS Proxy
AWS Relational Database Service (RDS) Proxy are a way to access your RDS databases via a managed service rather than a direct connection to RDS.
This gives you the following benefits:
- Allow application pooling and sharing of database connections.
- Improves the database efficiency by reducing the burden of managing large number of open connections. Thus reducing the amount of CPU and RAM requirements.
- RDS proxy is serverless
- Autoscaling
- provides high availability through multi-AZ configuration
- Reduces the time of failover by up to 66%
- RDS Proxy is supported by:
- MySQL
- PostgreSQL
- MariaDB
- MS SQL Server
- Aurora
- No code change is required on you applications.
- It enforces the use of IAM authentication for database access
- It requires the credentials to be stored in AWS Secrets Manager
- RDS Proxy is not publicly accessible and only good within your VPC