An EC2 Instance in AWS can be considered a server and as such can reside in your AWS environment without executing. In an AWS environment this has sever ramifications on Cost, because an EC2 instance that is not currently executing only incurs storage costs and the customer avoids virtual machine costs and network utilization costs. In this article we will review the process for starting, stopping and terminating already created EC2 instances.
1. The following is required before you create IAM user for your AWS Free Tier Account.
– An Active AWS Account with admin level permissions..
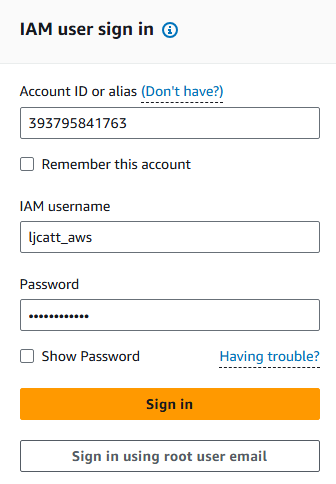
2. Logon to AWS as an IAM user at URL: https://signin.aws.amazon.com/
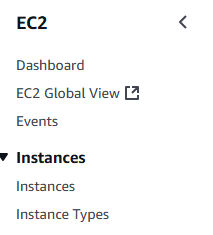
3. From the Home Console type EC2 in the search bar, select the star next to EC2, and select EC2

4. On the right hand menu bar select Instance.
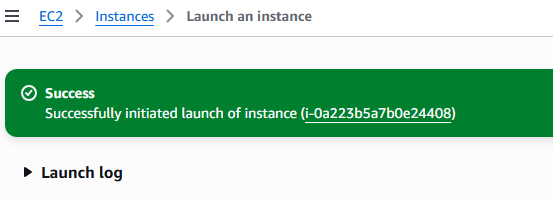
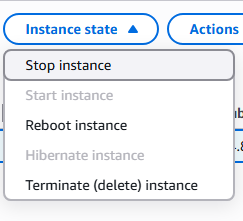
5. We currently have one EC2 Instances built out, select your instance with a check marki and press the Instances state. NOTE: Record the instance ID for each of your EC2 instances to control them from the CLI. In this example our Instance ID is i-0a223b5a7b0e24408

6. From this menu you can start, stop and terminate the instance. Note: Terminating an instance is recoverable, but the resources you had before are not guarantied to be available, so insure that you will not need the instance before terminating and place it in a stop state if there are any doubts.
7. You can also start, stop and terminate EC2 instances from you CLI application without logging into the console with the following commands and the instance id shown in setup 5 and the region id of the instance. In this example our Instance ID is i-0a223b5a7b0e24408 and the region_id is us-east-1 NOTE: You have to have
– Reports the details of your instance
aws ec2 describe-instances –instance-ids i-0a223b5a7b0e24408 –region us-east-1
– Stops the instance
aws ec2 stop-instances –instance-ids i-0a223b5a7b0e24408 –region us-east-1
– Starts the instance
aws ec2 start-instances –instance-ids i-0a223b5a7b0e24408 –region us-east-1
– Deletes the instance
aws ec2 terminate-instances –instance-ids i-0a223b5a7b0e24408 –region us-east-1