The creation of an AWS EC2 Instance is normally accomplished via the AWS Console, but can be performed via the Command Line Interface (CLI). In this example we will create a simple EC2 virtual instance with various parameters. We will start the instance using a User Data script defined for mysql configuration.
1. The following is required before you create IAM user for your AWS Free Tier Account.
– An Active AWS Account with admin level permissions..
2. Logon to AWS as an IAM user at URL: https://signin.aws.amazon.com/

3. From the Home Console type EC2 in the search bar, select the star next to EC2, and select EC2
4. On the right hand menu bar select Instance.
5. We currently have no EC2 Instances built out so this screen will be empty, press the Lauch Instances to begin

6. There are multiple sections on a single screen so we will take the inputs section by section. First provide a name for the new instance and select RHEL as the OS.
7. Next select the AMI (Amazon Machine Image) and the architecture, here insure that you select the one which states “Free tier eligible”.
8. Next in the section Instance Type select t2.micro which is free tier and in Key pair (login) click Create new key pair.
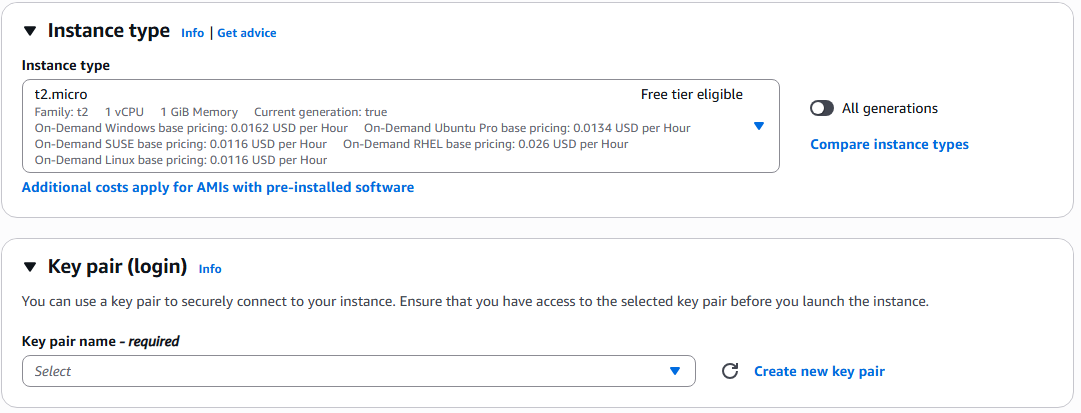
9. On the Create key pair page, name you key pair, select RSA, and Private key file format of .pem and select Create key pair. NOTE: if you are using windows 10 or below or Mac you may want to select .ppk if you intend to use Putty. Most will be using OpenSSH.
10. Insure that you store your .pem file in a secure location
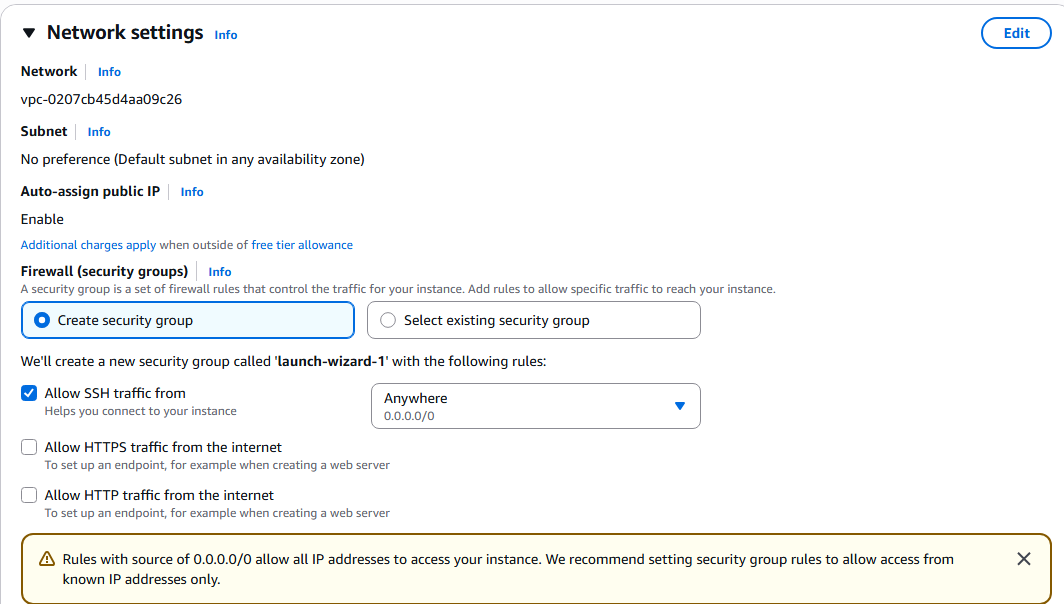
11. The next section is Network settings and will except the general defaults. A public IP will be assigned to our instance with the security group of launch-wizard-1 but you do have the option of selecting your owner security group for firewall configuration. We are creating a database EC2 instances so will only allow SSH traffic from outside, but if you where configuring a webserver or boundary server you may allow HTTPS and HTTP connections.
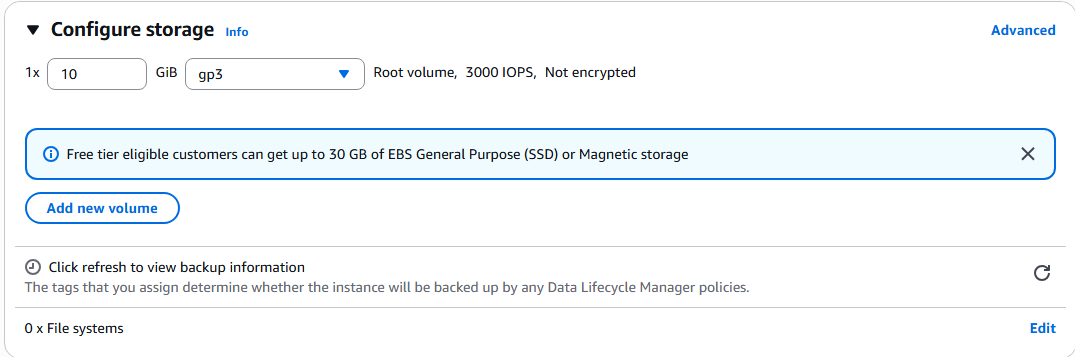
12. In the next section Configure Storage, you will select the type and speed of storage you like. We will leave the defaults.
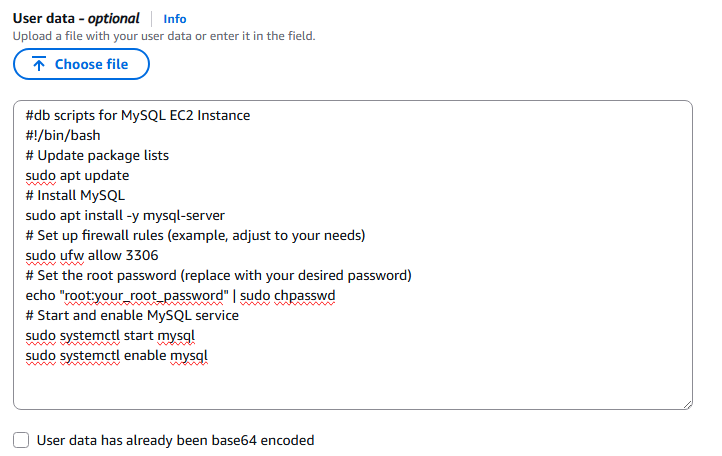
13. Next click the Advanced details section to expand. This is a simple EC2 database instance, so we will select all of the defaults, except the User data section. We will cut and past our own code to install a mysql database, start the database, and enable the database at first startup. Note: User Data is only executed at first instance startup.
14. Next select you can execute Launch instance button.
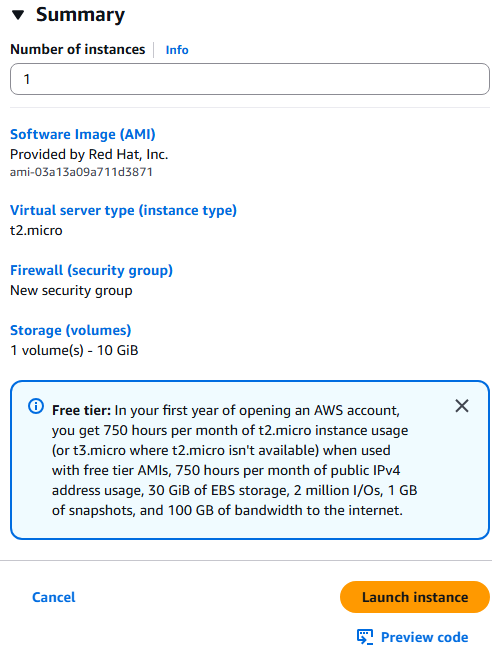
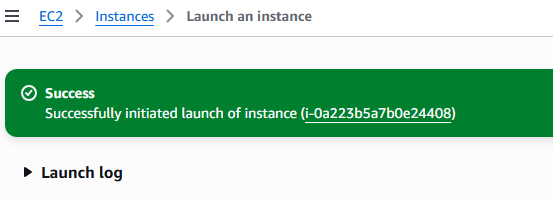
15. You will get a confirmation windows of Successful EC2 Instance startup.
16. Moving back to the EC2 ? Instances Console and selecting refresh, you can see that the new EC2 Instance is in a Running state by is currently initializing (meaning the user data is still executing).
17. Once completed, the status will change to green and is available for user, insure that you note the IP address for future connections via CLI.

18. This completes creating of a database EC2 Instance.