MFA stands for Multi Factor Authentication and provides a more secure user authentication method than just username and password. MFA requires that you have something you know (IE a Password) and something you possess (IE a cell phone). It is one thing to obtain someones password, but much more difficult to get the password and a physical device the user possesses. At a minimum you want to protect the Root Account and IAM users with MFA. In this example, we will be using google Authenticator on our cell phone.
Types of MFA devices:
- Virtual MFA – Google Authenticator or Authy
- Universal 2nd Factor (U2F) Security Key – Yubikey,
- Hardware Key Fob MFA Device
- Hardware Key Fob MFA Device for AWS GovCloud(US)
- The following is required before you create configuring MFA for IAM users and ROOT account.
- An Active AWS Environment.
- Root access to AWS
- An Active IAM User.
- A cell phone
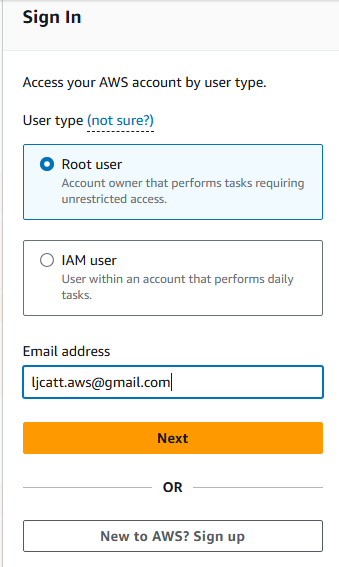
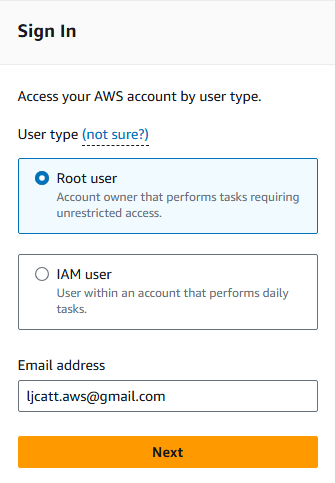
2. Logon to AWS as the root user at URL: https://signin.aws.amazon.com/
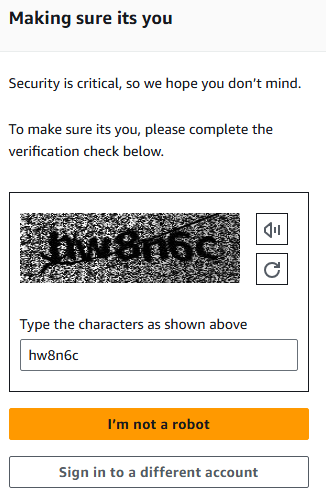
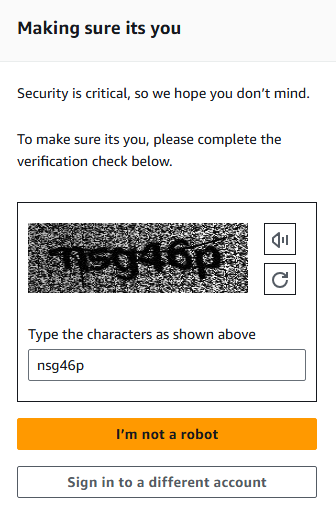
3. Prove that you are not a machine.

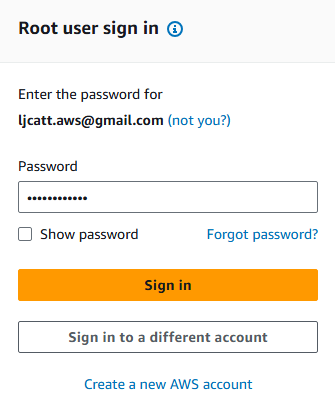
4. Provide you password
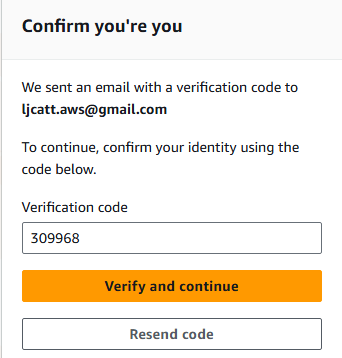
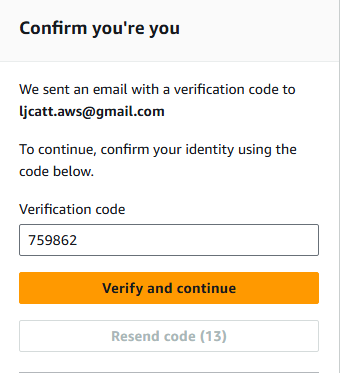
5. Retrieve you code from your email account and enter it.

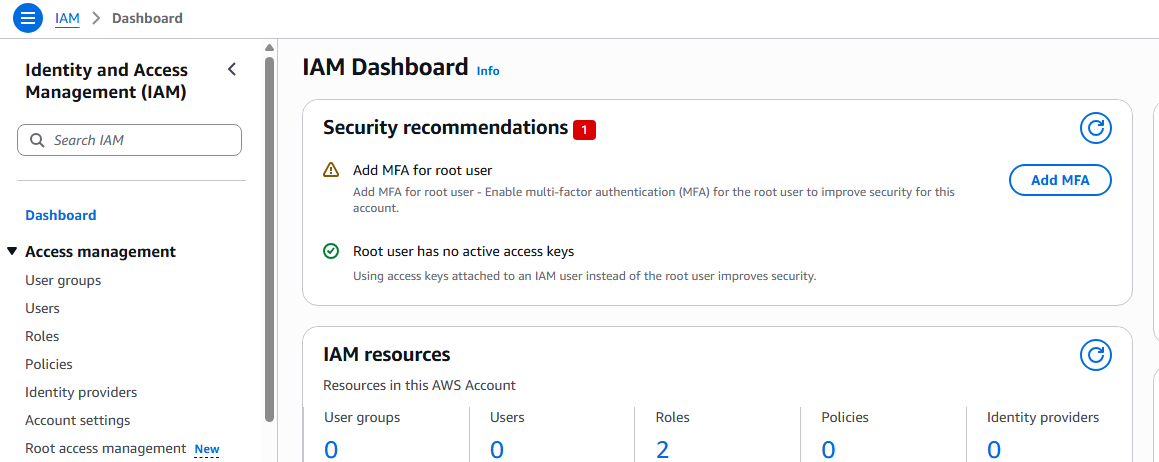
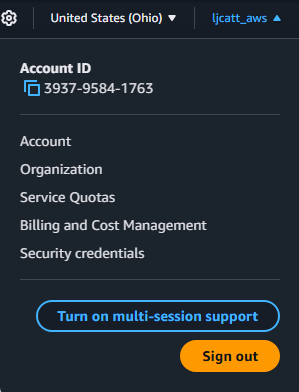
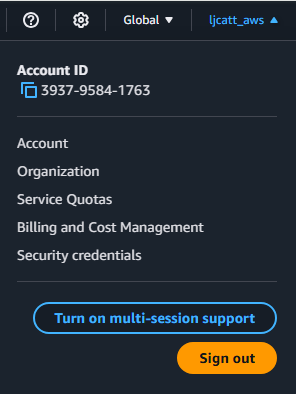
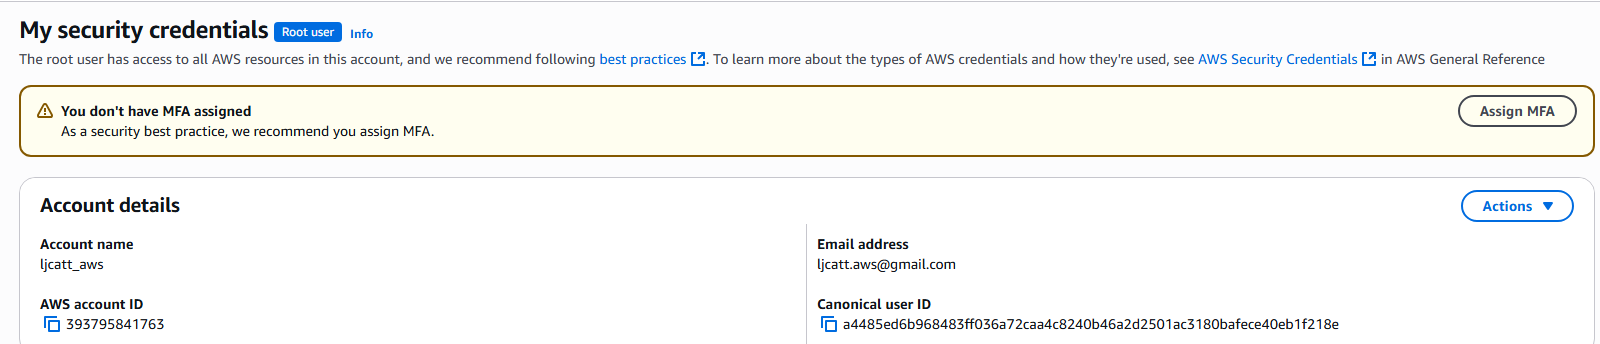
6. Once logon, click on the account name and select Security credentials.
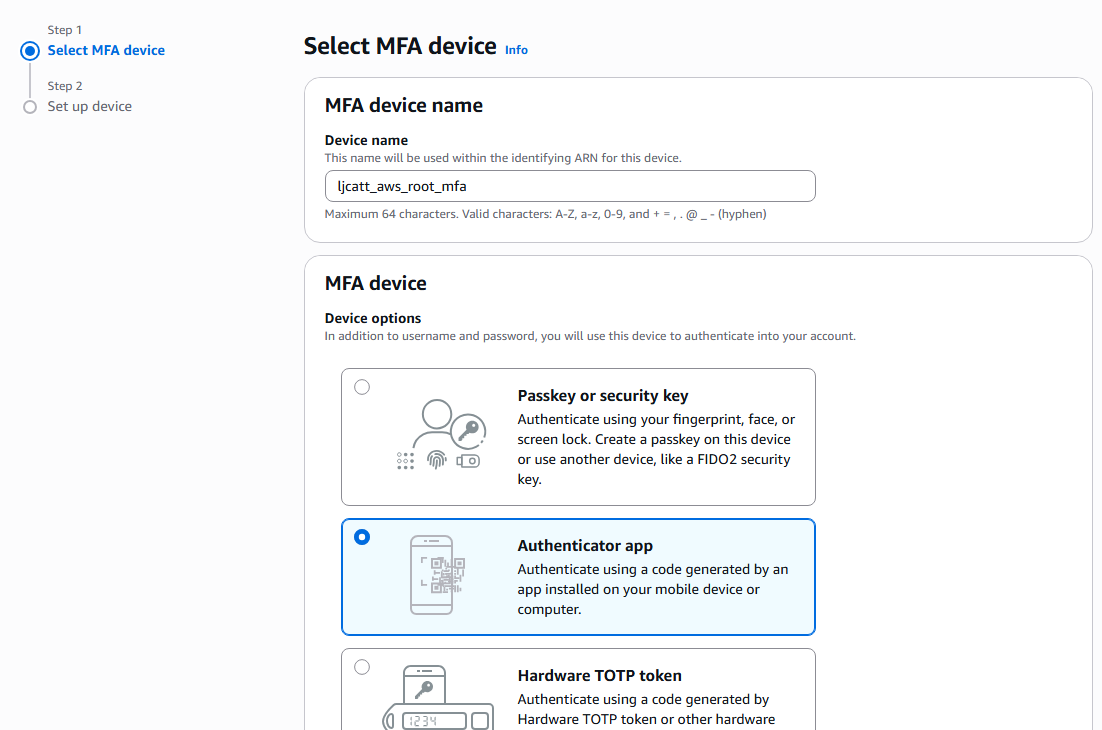
7. Select Assign MFA.
8. On the next page, name your device (ljcatt_aws_root_mfa), select authentication app, and press Next.
9. On the next page click show QR code, install Google Authenticator and open. Scan the QR code.
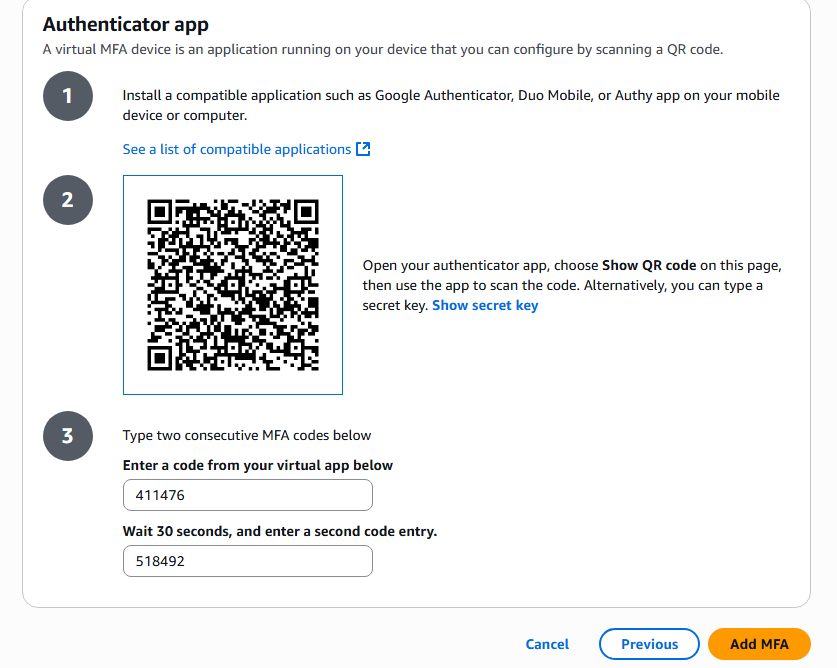
10. After Scanning the QR Code you will get two separate codes to enter, the first will be provided immediately and the second after 30 seconds. Enter the first and second codes and press Add MFA button.
11. After which you will receive a confirmation.
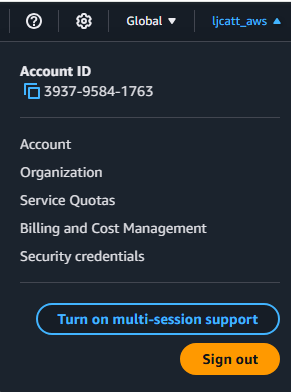
12. Test the MFA settings by logout of AWS by clicking the user in the top right corner and selecting Sign out
13. Select Login to console, Root user, enter email address and click Next.
14. Validate that you are not a robot.
15. Enter your password and click Sign In
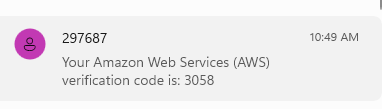
16. You will see a request for MFA code sent to google authenticator. Open the app and retrieve the code, which is only good for 30 seconds.
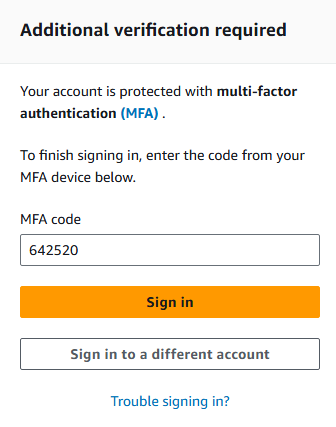
17. Once you provide the correct MFA code you will be logon to your AWS Concole.
18. This completes the setup of MFA.