AWS Route 53 TTL (Time To Live) is the amount of time that a response to a Route 53 request will be good for. So the local client machine may cache that response and be assured that the corresponding data is good for the equivalent time period. Specifying the TTL is a balance between reducing the number of requests that the Route 53 service receives and ensuring that the cache data on the remote machines is updated with any changes. Having a high TTL of 24 hours reduces the flexibility of changes you can make to your systems, while having a low TTL of 30 seconds will increase the number of Route 53 hits subsequently increasing your costs. All Route 53 records require you to define a TTL, except Alias records.
Category Archives: Oracle
AWS Ports to Know
AWS and all computer systems divide networking traffic by IP address and subsequent ports. Ports are designed to subdivide network traffic to a specific protocol, application or process being used. It is helpful to know the most common ports used in modern information systems and below are the ones you should know for AWS certification.
| Protocol | Port |
| FTP | 21 |
| SSH | 22 |
| SFTP | 22 |
| HTTP | 80 |
| HTTPS | 443 |
| PostgreSQL | 5432 |
| MySQL | 3306 |
| Oracle | 1521 |
| MSSQL | 1433 |
| MariaDB | 3306 |
| Aurora PostgreSQL | 5432 |
| Aurora MySQL | 3306 |
AWS ElastiCache Overview
AWS ElastiCache are in memory databases with very high performance and low latency. They designed to reduce the load on databases for high levels of reads. They allow your application to be stateless by placing the placing the current state of the data into ElastiCache. AWS takes care of OS maintenance, optimization, setup, configuration, monitoring, recovery and backup of the ElastiCache making it transparent to customer. Normally you have to perform a lot of code changes for existing application to use the ElastiCache option.
The architecture to use ElastiCache for RDS interaction:
- Application query the ElastiCache
- If ElastiCache has required data it returns to Application
- If ElastiCache does not have required data it queries the RDS and returns it to Application (storing internally for next use).
- This helps reduce the frequency of access to RDS proper
- The application has to have a ElastiCache validation method to ensure data is most up to date.
The architecture to use ElastiCache for User Session Store:
- User logon to application
- Application writes user session data to ElastiCache
- User hits a different application instance and their user session data is still valid.
- Thus reducing the number of logins required by end user.
Compare Redis vs Memcached:
Redis:
- Multi AZ with auto-failover
- Provides read replicas to scale reads and give you high availability
- Provides backup and restore
- Support sets and sorted sets
Memcached:
- Multi-node for partitioning of data providing sharding
- Does not provide read replica
- It is not persistent
- provides backup and restore only with serverless version
- provides multi-threaded architecture which increases performance.
AWS Advance Aurora Topics
AWS Certificate topics cover a lot of advance topics on Aurora RDS. This article attempts to cover all questions which maybe asked about Aurora.
Aurora Replica Auto Scaling
- Automatically increasing the number of read replica database based on increased CPU usage.
- Reader endpoint automatically increased to accommodate new read replica databases.
- Reader endpoint load balances over all read replica databases.
Aurora Custom Endpoints
- You create some read replica database on larger EC2 instances for RDS.
- Create Custom endpoint to allocate resources to larger EC2 instances for RDS.
- Use case some process require more compute power from Read Replica IE Analytics.
- You no longer use the read endpoint but setup different custom endpoints for different types of processing.
Aurora Serverless
- Automated database instantiate and auto scaling based on usage
- Good fro infrequent, intermittent or unpredictable workloads.
- No capacity planning required.
- Pay per second of use and can be more cost-effective.
- Client goes through Proxy Fleet which determines the number of Aurora databases needed for the workload.
Global Aurora
- Aurora Cross Region Read Replica
- Useful for disaster recovery.
- Simple to put in place.
- Aurora Global Databases (recommended)
- 1 Primary Region (read/write)
- Up to 5 secondary (read-only) regions, replication lag is less than 1 second.
- Up to 16 Read Replicas per secondary region
- Helps for decreasing latency to clients.
- Promoting another region (for disaster recovery) has an RTO of less than 1 minute.
- Typical cross-region replication takes less than 1 second.
Aurora Machine Learning
- Enables you to add ML-based predictions to your applications via SQL
- Simple, optimized and secure integration between Aurora and AWS ML services
- Supported services
- Amazon SageMaker (use with any ML model)
- Amazon Comprehend (for sentiment analysis)
- You don’t have to have ML experience
- Use Cases: fraud detection, ads targeting, sentiment analysis, product recommendations
Babelfish for Aurora PostgreSQL
- Allows Aurora PostgreSQL to understand commands targeted for MS SQL Server (T-SQL)
- Therefore Microsoft SQL Server based applications can work on Aurora PostgreSQL
- Requires no to little code changes (using the same MS SQL Server client drivers)
- Same applications can be used after a migration of your database (using AWS SCT and DMS)
RDS Overview
RDS (Relational Database Service) is used to manage Relation Database Systems.
The following RDBMS that are supported by AWS RDS are:
1. Postgres
2. MySQL
3. MariaDB
4. Oracle
5. Microsoft SQL Server
6. IBM DB2
7. Aurora (AWS Proprietary database)
The Benefit using RDS over deploying your own database system:
1. Automatic provisioning of OS patching
2. Continuous backups and restore to specific timestamps.
3. Monitoring dashboards
4. Read replicas for improved read performance
5. Multi AZ setup for disaster recovery
6. Maintenance windows for upgrades
7. Scaling both vertical and horizontal
8. Storage backed by EBS
You cannot SSH into your RDS instances.
We should highlight the benefit of RDS Storage Auto Scaling feature which is one of the greatest benefits to managing an RDS. You simply enable the feature and set a Maximum Storage Threshold for the entire Database Storage and you achieve the following:
1. Dynamically increases storage on demand when.
a. Free space falls below 10%
b. Low storage level lasts for at least 5 minutes
c. 6 hours have passed since last increase.
2. RDS detects low storage levels automatically.
3. Avoids manual scaling your database storage.
4. Benefits application with unpredictable storage requirements.
Cons of using RDS
- No OS access
- Higher Cost compared to traditional dabase configuration
- Limited configuration options and not costumizable.
- Performance degradation of database.
- Limited on its scalability.
- Dependent on AWS with sever restrictions on administrative functions of customer.
- May require downtime controlled by AWS not customer.
- Zero transparency on database maintenance.
- Lacks many database features of standard installation and configuration.
AWS Elastic Network Interfaces (ENI)
Elastic Network Inferfaces are logical components in your AWS Virtual Private Cloud which present Virtual Network Cards. ENI can be created independently of EC2 Instances and can be assigned at any time on the fly and moved from one instance to another. Each ENI has the options of:
1. One primary private IPv4 address and can have one or more secondary private IPv4 addresses
2. One Elastic IP address per private IPv4.
3. One Public IPv4 address
4. One or more security groups
5. A MAC address
6. ENI are bound to one availability zone.
______________________________________________________________________________________________________________________________________________________________
1. Logon to AWS as an IAM user at URL: https://signin.aws.amazon.com/
2. From the Home Console type EC2 in the search bar, select the star next to EC2, and select EC2

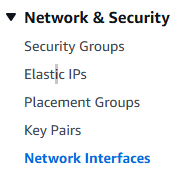
3. On the let hand menu bar select Network Interfaces.
4. The page will display all currently existing ENI, we currently have created two EC2 Instances and AWS created two ENI for them by default. Select Create network interface.

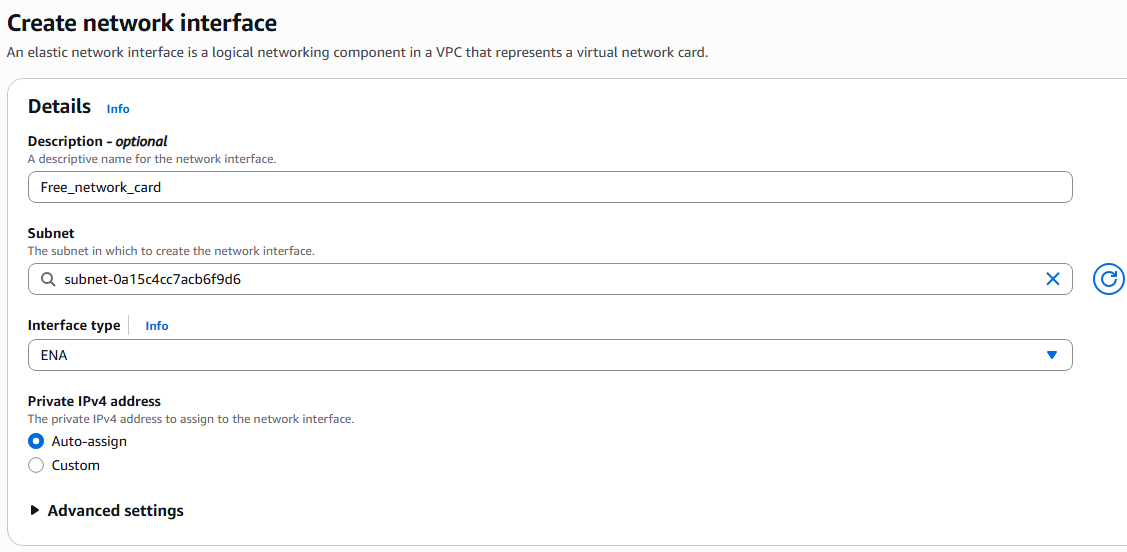
5. Under details, enter the description of your network card, the subnet, Interface type, and Auto-assign of IP address.
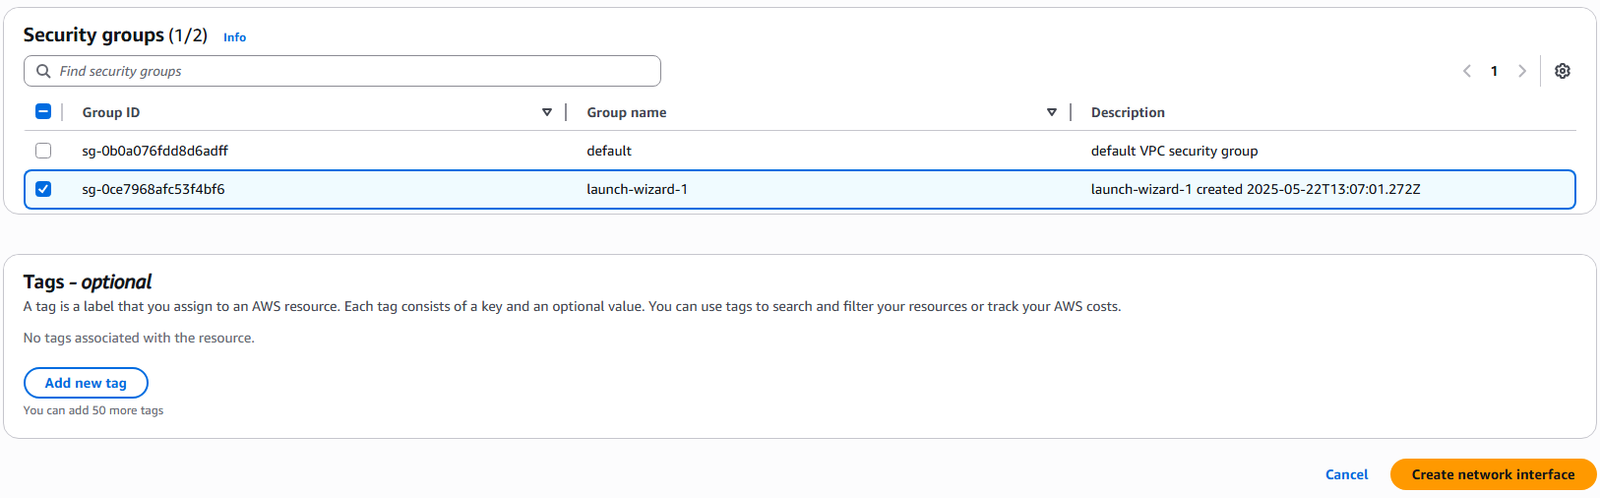
6. In the security groups section, select an existing group and enter a Tag if desired. Click the Crete network interface to proceed.
7. The creation will be confirmed on the next page.

8. You can modify, associate, or delete the ENI by clicking on the ENI of choice and select Actions.
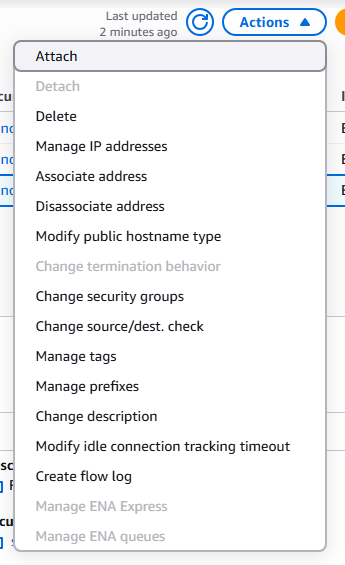
AWS Placement Groups
AWS placement groups allow you to have control over EC2 Instance physical layout in relationship to each other. A good example of this would be a Cluster configuration were you are attempting to share the workload among multiple EC2 Instance. Placement groups can be designed in one of three ways:
Cluster – Configured into low-latency group within a single Availability Zone.
1. Great network performance, but if AZ fails all fails
2. Big Data jobs, Applications requiring extremely low latency are examples
Spread – Spreads Instance across underlying hardware. This is limited to 7 Instance per Placement Group per Availability Zone. It is intended for Critical applications.
1. Minimize loss – Very low risk of failure.
2. Can span multiple AZ and EC2 Instances are on different physical hardware
3. Limited growth – only 7 Instances
4. Maximum availability of applications and Critical Applications where you need failures to be isolated.
Partition – Spreads Instances across many partitions on different sets of rack within one Availability Zone. Can Scale to 100s of EC instance per placement group.
1, Spread across multiple partitions – each partition is a rack.
2. Up to 7 partitions per AZ and can be spread across multiple AZ
3. Supports 100s of EC2 Instances
4. EC2 Instance in partition do not share partition with other EC2 Instances.
5. Partition failure can affect many EC2 instances but not other partitions.
6. Big Data operations is a good example of use.
1. The following is required before you create IAM user for your AWS Free Tier Account.
-An Active AWS Account with admin level permissions.
-Multiple EC2 Instances
2. Logon to AWS as an IAM user at URL: https://signin.aws.amazon.com/

3. From the Home Console type EC2 in the search bar, select the star next to EC2, and select EC2
4. On the left hand menu bar select Placement Groups.

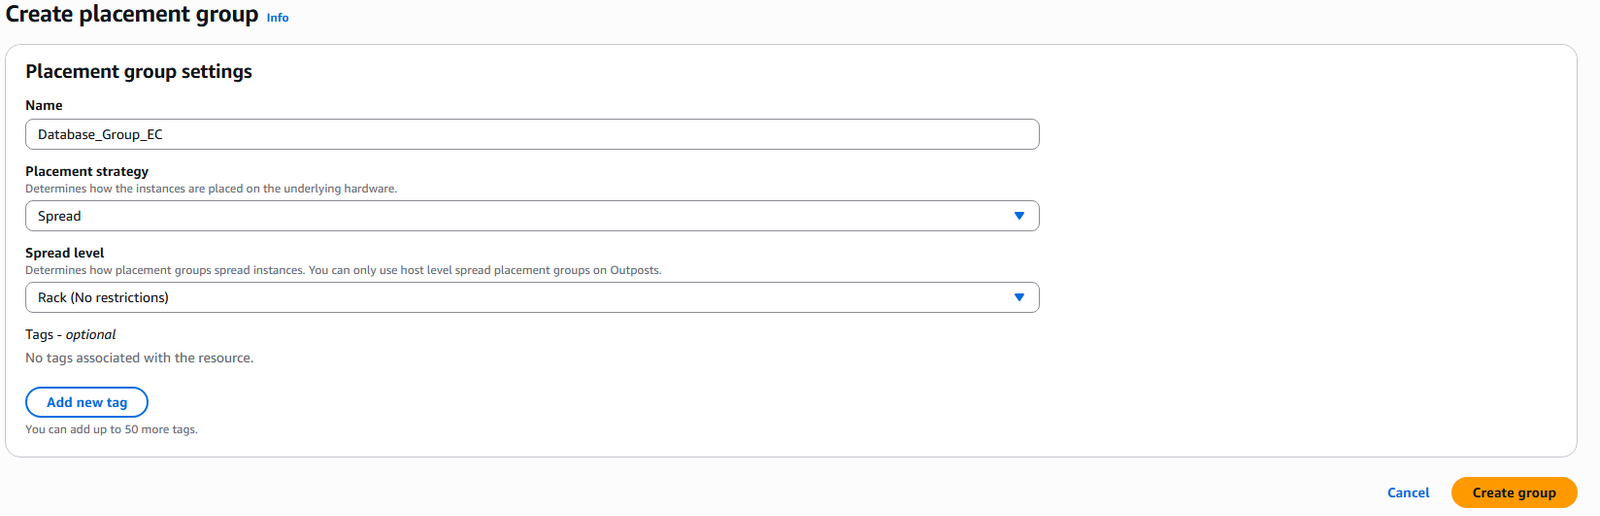
5. Currently we have no placement groups, select Create placement group

6. On the Name the placement group, select Cluster, Spread, or Partition, and spread level or number of partition options you desire. Press Create group to proceed.
7. During the creation of EC2 Instances you can select the partition group as an option for deployment of new EC2 Instances.
AWS Creating IAM Roles for Services
AWS Services execute process that require permissions thus need permissions similar to an IAM user account. IAM Roles are created which are granted permissions and the roles are granted to the service.
Common Roles are:
- EC2 Instance Role
- Lambda Function Role
- Roles for CloudFormation
1. Logon to AWS as an IAM user at URL: https://signin.aws.amazon.com/
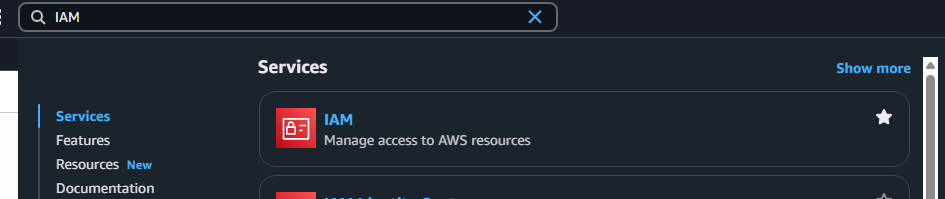
2. In the search bar type IAM, highlight the Star next to IAM (So it will appear on you Console) and select IAM.
3. On the left hand side of the screen, scroll down and select Roles.
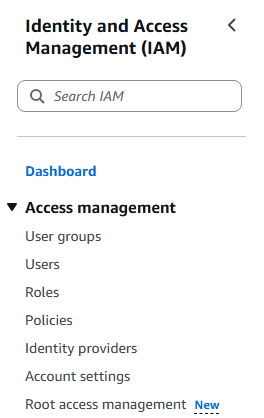
4. The Roles Console appear and select Create Role

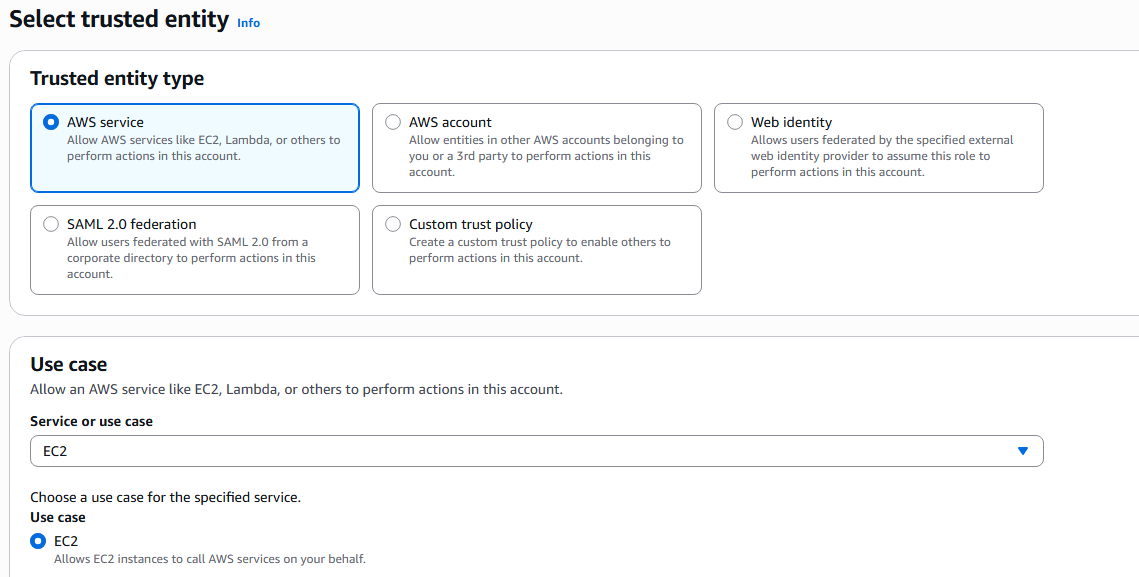
5. The 3 step process will be presented. The first step is to select the Entity you wish to create the role for. There are 5 entity types: AWS Service, AWS Account, Web Identify, SAML, and Custom trust policy. We will choose AWS Service and the service that it will apply to chose EC2.
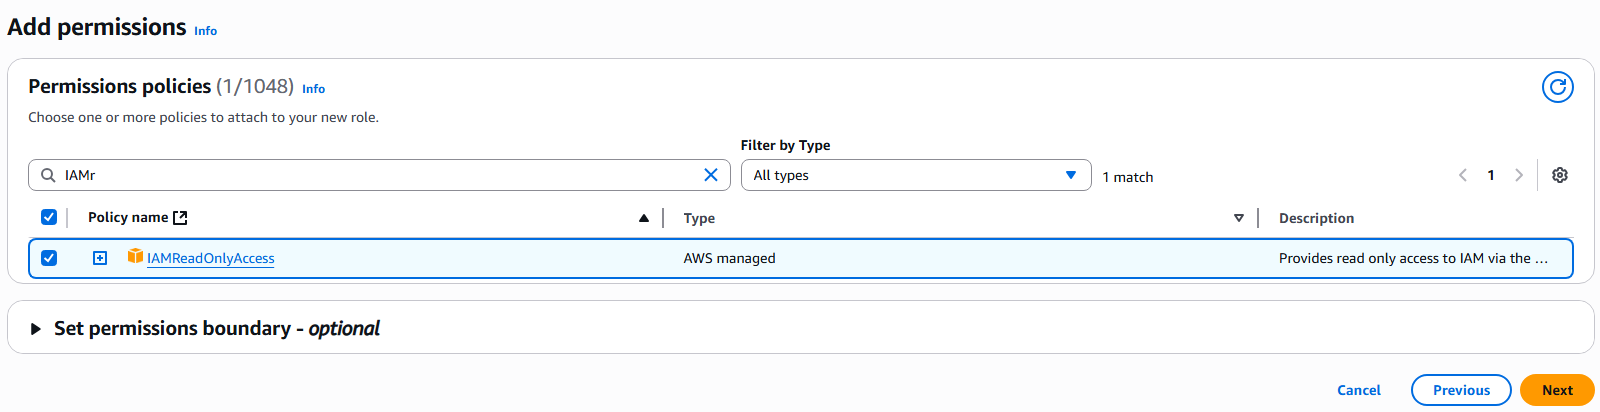
6. Next page we will need to attach policies for the new Role, basically a defined list of permissions. We will give the role permissions to read from IAM with the policy IAMReadOnlyAccess. Click Next.
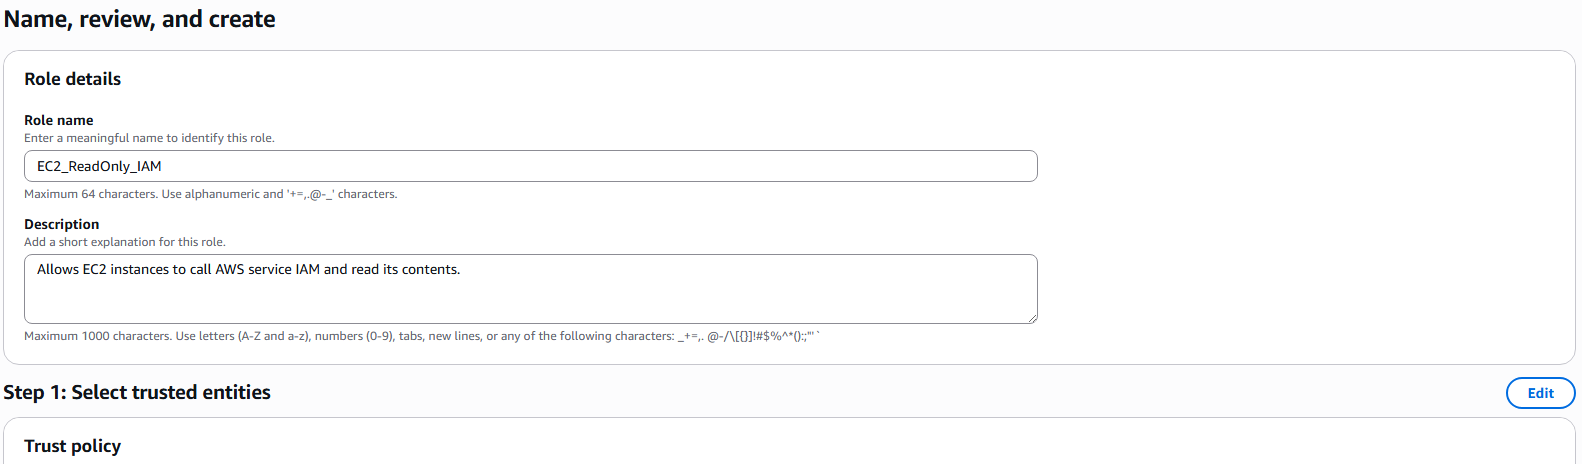
7. On the next page you will give the role a name and description and you will be presented with JSON code for the new role. Click on Create role.
8. The new role will appear in your role list.
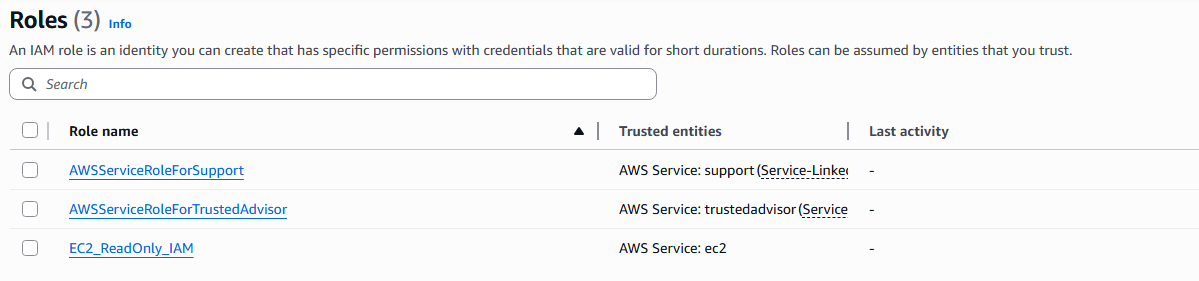
9. This role can now be applied to an EC2 instance that we currently do not have but will be produced in another article.
AWS Generating Access Keys
Access Keys are required to connect to AWS through the AWS Command Line Interface (CLI) and the AWS Software Developer Kit (SDK). Access Keys are generated through the AWS Management Console and each user manages there own individual access keys. Access keys are just like a password and should never be shared between users. In this instructions we will create Access Keys for an IAM user outside of root.
1. Logon to AWS as the root user at URL: https://signin.aws.amazon.com/
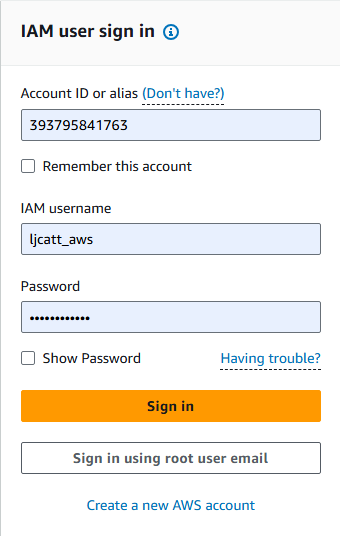
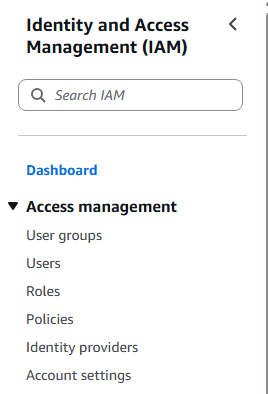
2. In the search bar type IAM and open the IAM console.

3. Select user from the left hand side menu bar.
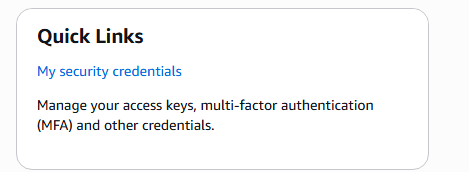
4. Select the My security credentials.
5. Go to Access keys and select Create access key

6. Select Command Line Interface (CLI), check mark the confirmation and select Next.

7. Enter a description tag and select Create access key.
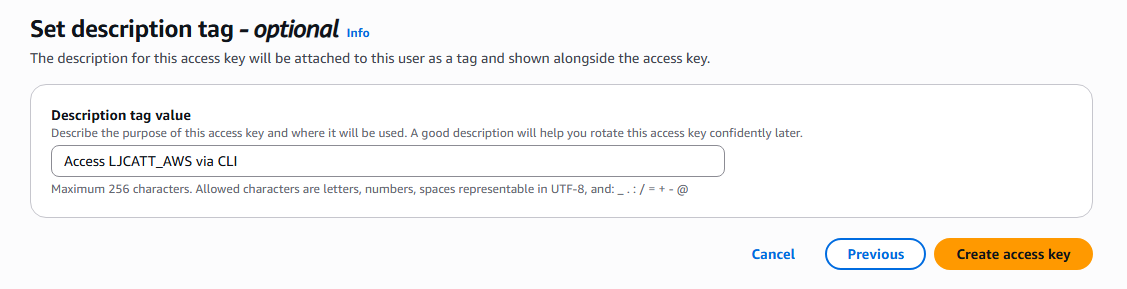
8. Access key will be generated, download it as a csv and press done.
9. Now you have access key to enter your AWS environment via the CLI.
Check patch level of Oracle RDBMS from OS
Most software only have a single patch process to update the software, however relational databases are a bit different.  You have both a binary set of files for the software and the internal configuration and objects within the database itself.   Thus, it is necessary to validate data both patch levels at the OS level and database level.   Mismatch patches at this level can cause significant errors during operations.

Check Oracle Patch level at OS

To see the binary level patching of the Oracle software packages,  you have to use the opatch utility to see the internal entries in oraInventory directory.  Use the following opatch command to view your oraInventory.


/code
opatch lsinventory

sun1{orcl}-~> opatch lsinventory
Oracle Interim Patch Installer version 12.2.0.1.23
Copyright (c) 2021, Oracle Corporation.  All rights reserved.


Oracle Home       : /oracle/product/12.2.0/db_home1
Central Inventory : /oracle/oraInventory
   from           : /oracle/product/12.2.0/db_home1/oraInst.loc
OPatch version    : 12.2.0.1.23
OUI version       : 12.2.0.1.4
Log file location : /oracle/product/12.2.0/db_home1/cfgtoollogs/opatch/opatch2021-08-18_08-31-56AM_1.log

Lsinventory Output file location : /oracle/product/12.2.0/db_home1/cfgtoollogs/opatch/lsinv/lsinventory2021-08-18_08-31-56AM.txt
--------------------------------------------------------------------------------
Local Machine Information::
Hostname: sun1.testdomain.com
ARU platform id: 23
ARU platform description:: Solaris Operating System (SPARC 64-bit)


Installed Top-level Products (1):

Oracle Database 12c                                                  12.2.0.1.0
There are 1 products installed in this Oracle Home.


Interim patches (3) :

Patch  32473172     : applied on Fri Jun 04 12:55:51 EDT 2021
Unique Patch ID:  24158925
Patch description:  "OJVM RELEASE UPDATE 12.2.0.1.210420 (32473172)"
   Created on 1 Apr 2021, 09:12:15 hrs UTC
   Bugs fixed:
     25811105, 25890046, 26023042, 26570134, 27000702, 27461740, 27952586
     27642235, 27539876, 28502098, 28915870, 29254623, 29774362, 30160625
     30534662, 30855101, 31306261, 26716835, 31668872, 29224710, 28394726
     24817447, 32165759, 31997805, 26451793, 32523206, 29415774

Patch  32692908     : applied on Fri Jun 04 12:50:09 EDT 2021
Unique Patch ID:  24229706
   Created on 13 May 2021, 11:26:43 hrs PST8PDT
   Bugs fixed:
     29839481, 31193511
   This patch overlays patches:
     32507738
   This patch needs patches:
     32507738
   as prerequisites

Patch  32507738     : applied on Fri Jun 04 12:46:30 EDT 2021
Unique Patch ID:  24169281
Patch description:  "Database Apr 2021 Release Update : 12.2.0.1.210420 (32507738)"
   Created on 9 Apr 2021, 05:33:05 hrs UTC
   Bugs fixed:
     7391838, 8480838, 8932139, 8975044, 12763598, 13554903, 14221306
     14690846, 15931756, 16002385, 16438495, 16727454, 16942578, 17027695
     17533661, 17947871, 17958365, 18308268, 18521691, 18594510, 18774543
     18878420, 18986501, 19072655, 19211433, 19285025, 19327292, 19526548
     19614243, 19647894