Read Replicas allow us to scale our read operations in AWS RDS.
They have the following characteristics:
1. You can have up to 15 Read Replicas
2. They can be within same AZ, Cross AZ, or Cross Region
3. Replication is Async from R/W database so they eventually are consistent
4. The Read Replica can be promoted to become its own database
5. Application must update the connection string to use Read Replicas.
6. Read Replicas can be setup as Multi AZ for Disaster Recovery, but it will not have SYNC updates, so can loss data.
7. Use Case for Read Replicas: Moving Reporting and Analytics off read/write database.
======================
Networking Cost associated with Read Replica:
1. Network costs are incurred when data goes from one AZ to another normally.
2. Read Replica traffic within the same Region and different AZ are not charged a network fee.
3. Read Replica traffic in different Regions and different AZ are charged a network fee.
======================
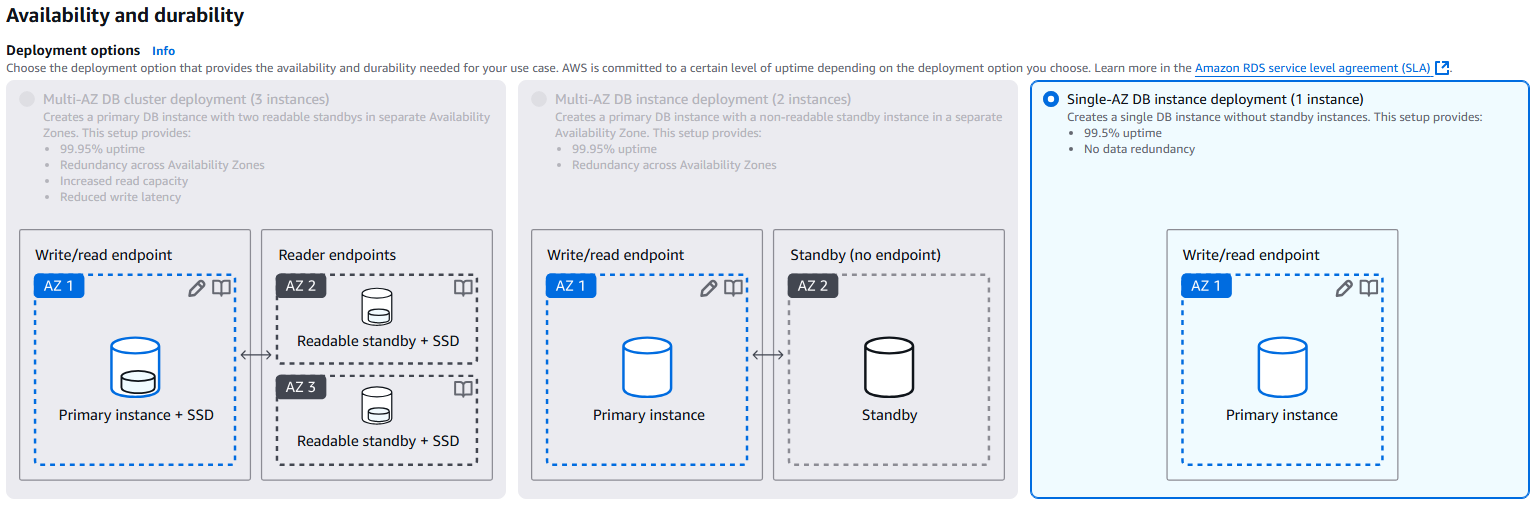
RDS Multi AZ is normally used for disaster Recovery and they have the following characteristics:
1. You have an RDS Standby database in one AZ with the RDS Master database in another AZ.
2. The RDS Master sends SYNC replication to the Standby RDS, the writes to standby RDS must be completed before transaction on Master is complete.
3. One connection to RDS DNS name with automatic app failover to standby.
4. This failover increases the overall availability of the RDS.
5. Failover occurs during loss of AZ, loss of network, loss of instance, or loss of storage.
6. No manual changes to application is required during failover.
7. This is not used for scaling of any type.
======================
Moving RDS from Single AZ to Multi AZ
1. Zero down operation, never loss use of the RDS database.
2. Only need to click “modify” for the database and select multi-AZ.
3. Internally, the following occurs:
a. Snap shot is taken of the Master database.
b. New database creased from snapshot in a new AZ
c. Synchronization is established between the two databases.